NDTのD2D Registrationを試してみる
NDTについて
NDT(Normal Distribution Transform)は、大規模な点群データをざっくりと扱いたいときに使う特徴量で、空間を適当なGridで分割してGrid内の点群分布を正規分布に表したものです。点群が多くなっても高速に計算できる、応用範囲が広く、多くのアルゴリズムで精度が思いのほか高いなどのメリットがあります。
NDTを使って位置合わせを計算するアルゴリズムもいくつか提案されていて、NDTと点群(P2D: Point to Distribution)、NDT-MCL(パーティクルフィルタ)、NDTとNDT(D2D: Distribution to Distribution)などが知られています。ROSのSLAMの位置合わせアルゴリズムとしてよく使われていたり、国内では、名古屋大学のAutoware[1], 豊田中央研究所[2], 九州大学の倉爪研究室[3]などが力を入れているようです。
NDT-D2D Registration
NDT-P2D, NDT-MCLはなんだか無駄が多い気がして使う気にならなかったのですが、NDT-D2DはNDT同士を対応付けて位置姿勢をニュートン法で求めるというシンプルな方法をとるので良さそうに見えます。
元の論文は[4]で、実装例はスウェーデンのエーレブルー大学にあります。
github.com
Linux環境でROSが使える人は、ROSパッケージが出ていますので素直にこちらを参照してください。
ndt_registration - ROS Wiki
NDT-D2DをWindowsで試したい
Orebro大のソースコードは一見大きなライブラリに見えますが、NDT-D2Dの部分だけを部分的に取り出しても動かすことができるようです。
意味づけラベルとNDTを一緒に使うというzaganidisさんの提案のse_ndtのコードの内、oru_minimalが参考になります、が、OcTreeなども省いてしまっているようなので、これを参考にオリジナルからソースコードを切り出してみます。
Semantic-assisted 3D normal distributions transform for scan registration in environments with limited structure - IEEE Conference Publication
github.com
NDT-D2DをWindowsのopenFrameworksで試す
github.com
に切り出したソースコードを置きます。gettimeofdayなどLinux用関数を強制的に置き換えていますので、Windowsでしか動かない部分があると思います。変更を加えたソースコードの周りには//////(スラッシュ五個)を置いていますので、修正時の参考にしてください。
依存ライブラリとして、PCLとopenCVが必要です。
cvl-robot.hateblo.jp
を参考に
vcpkg install pcl:x64-windows
vcpkg install opencv:x64-windows
を通してください。vcpkg integrate installをしてしまうと、openFrameworksが面倒くさくなるのでしない方が良いです。インストールフォルダに手動でインクルードパスとライブラリパスを通してください。
include path: C:\vcpkg\installed\x64-windows\include
library path: C:\vcpkg\installed\x64-windows\lib
ライブラリ名を手動で列挙するのは苦行なので、こちらの便利なアプリを使うと良いでしょう。
neno-garden.com
実行結果
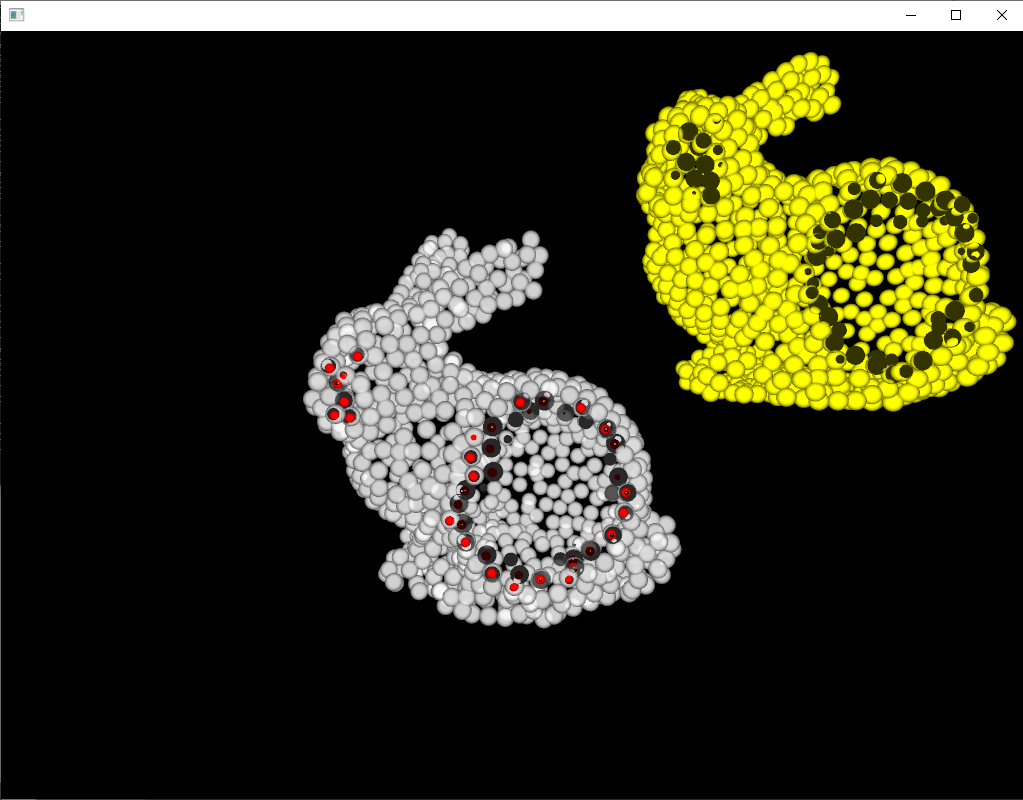
(多分ライブラリの実装上の制限で)スケールを合わせる必要がありますが、ちゃんと位置合わせ出来ています。
初期位置

赤い点が位置合わせ結果
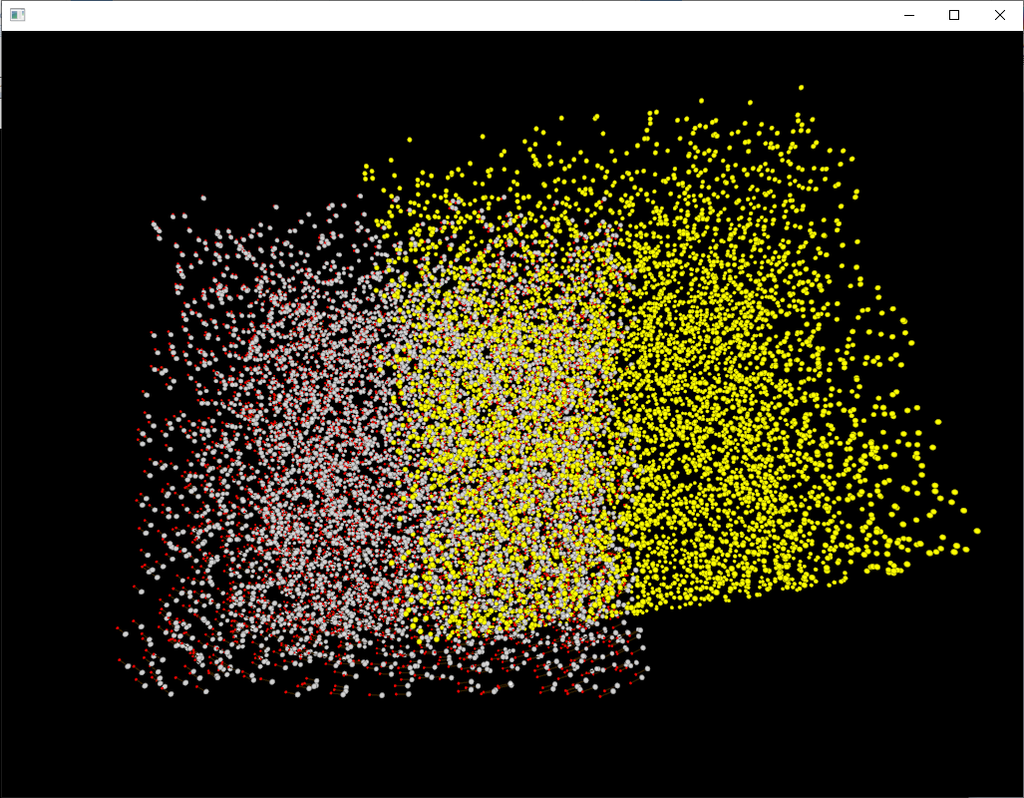
ICPじゃ初期位置合わせを厳密にやらないと収束しそうもないデータでも(ぴったりじゃないけど)収束している。
赤い丸が位置合わせ結果
[1] autoware.ai
[2] https://ipsj.ixsq.nii.ac.jp/ej/index.php?action=pages_view_main&active_action=repository_action_common_download&item_id=107049&item_no=1&attribute_id=1&file_no=1&page_id=13&block_id=8
[3] https://www.jstage.jst.go.jp/article/jrsj/31/9/31_31_896/_pdf
[4] http://citeseerx.ist.psu.edu/viewdoc/download?doi=10.1.1.818.9757&rep=rep1&type=pdf
WindowsでPCLをインストールする2018年度版
Sugiuraさんのブログにまとめられています。が、WEBへのアクセスがとても遅いので注意が必要です。
Point Cloud Library is available in Vcpkg – Summary?Blog
Vcpkgのインストール
2018年現在、もっとも簡単なWindowsへのインストール方法は、Vcpkgを使う方法のようです。
github.com
からソースをダウンロードして分かり易いパスに展開します。例:e:\vcpkg
batファイルを実行するとビルドが開始されます。
bootstrap-vcpkg.bat
PCLのインストール
Unanancyowenのブログの記述に従って、コマンドプロンプトからvcpkgを実行します。
例えば、x64静的ライブラリが欲しい場合、次を実行します。
# x64 static link library
vcpkg install pcl:x64-windows-static
インストールとビルドが進むのですが、途中でエラーが出て止まってしまいます。
https://eiichiromomma.github.io/2017/10/13/vcpkg-ninja/
こちらの記事によると、英語パックのインストールが必要とのことですので、こちらをインストールします。
Download Microsoft Visual Studio 2015 Language Pack from Official Microsoft Download Center
再度、vcpkg installを実行すると処理が進みますが、大きなライブラリ群なので時間がかなりかかります。
追加ライブラリをインストールする場合
# Build PCL with OpenNI2, Qt and PCAP
vcpkg install pcl[openni2,qt,pcap]:x64-windows --featurepackages
VisualStudio環境から使えるように設定する、設定をはずす
# Integrate
vcpkg integrate install
# UnIntegrate
vcpkg integrate remove
今日の登山用品
地震や台風で停電が各地で頻発しているのを口実に、キャンプ用品を買いたいなと考えています。無駄にチタンが良いな。

EPI(イーピーアイ) ATSチタンクッカー TYPE-3 セット TS-203
- 出版社/メーカー: EPI(イーピーアイ)
- 発売日: 2012/09/24
- メディア: スポーツ用品
- クリック: 3回
- この商品を含むブログを見る

EPI(イーピーアイ) REVO-3700ストーブ(日本製) S-1028
- 出版社/メーカー: EPI(イーピーアイ)
- 発売日: 2012/09/24
- メディア: スポーツ用品
- クリック: 5回
- この商品を含むブログ (1件) を見る
octomapを使って、実データからマインクラフトみたいな空間を切り出す(その1)
マインクラフトを遊んだことが無いのでゲームはよくわかってないのですが、マインクラフトみたいに全てがボクセルで表現された空間を作りたいと思います。
3次元空間を表現しようとする場合、単純な3次元配列を使うととんでもなくデータが多くなるので、オクトツリーなどのデータ構造を使ってデータ量を減らすことが一般的です。octomapはそのようなライブラリの最も有名なものの一つで、ロボットや自動運転の車のSLAM地図を表現するのによく使われています。また、ROSで最も便利に使われるライブラリの一つでもあります、が、このページではROSを介さずに使います。
OctoMap - 3D occupancy mapping
ライブラリの概要はこちらのPDFが最も分かり易かったです。
http://www2.informatik.uni-freiburg.de/~hornunga/pub/hornung13roscon.pdf
octomap関係なく地図のデータ表現の基礎は、いつものMy Enigmaさんの記事が勉強になります。
自律移動ロボットのためのグリッドマップ作成MATLABサンプルプログラム - MyEnigma
ノード、リーフ、ルートなどのツリー型データ構造の用語等は、こちらのWikipediaにまとまっています。
木構造 (データ構造) - Wikipedia
インストール
octomapのインストールは、githubからソースを取得して、cmake、ビルドを普通に通せば完了します。
github.com
今回はoctovisを使いません。可視化アプリのoctovisをビルドしようとするとQt4が必要になり、ちょっと面倒くさいので、必要になったらoFで自前で作ることにします。
基礎知識
ボクセルのデータ表現
octomapの空間(ノード)は、大雑把に3種類で表現されます。作ったばかりの空間は、Unknownで満たされていて、データを追加するたびにリーフにOccupiedが追加されていきます。
- Unknown: 未知の空間。NULLデータが入っている。
- Free: 中に何もないことが分かっている空間。
- Occupied: 何かしらのデータが入っている空間。0~1の確率で表現される。
(追加する、予定。予定を忘れがち。)
使い方の例
空間を作る
一辺が0.05の長さのボクセルを最小単位にして空間を作ります。
std::shared_ptr<octomap::ColorOcTree> tree;
tree = std::make_shared<octomap::ColorOcTree>(0.05);
レイを一つ飛ばして空間を削り出す。
光線を一つの線分として、線分と衝突した空間のボクセルのデータを書き換えます。
octomap::point3d origin(x0, y0, z0); // 計測原点。カメラの3次元座標。
octomap::point3d end(x1, y1, z1); // 計測した1点の3次元座標。
tree->insertRay(origin, end); // レイを飛ばして空間を削り出す。
空間の更新
レイの挿入が一通り終わったら、空間全体を更新します。
tree->updateInnerOccupancy();
データの保存
コマンド一発でファイルに吐いてくれます。
tree->writeBinary("map.bt");
ただし、拡張子によってデータ表現がいくつかあるので難しいことをし始めたら注意が必要です。
.graph: openGraph();
.bt: openTree();
.ot: openOcTree();
.hot: openMapCollection();
.dat: openPointcloud();
未知空間のボクセルの中心座標を取得する
int lv = tree->getTreeDepth(); // 調べたいデータ階層の深さ。例として、データ最深階層を指定。ただし、0を指定するとさらにもう一つ細かいみたい。
double offset = 0.5 * tree->getResolution();
octomap::point3d pmin(-1. - offset, -1. - offset, -1. - offset); // 調べたい領域のバウンディングボックスの最小端の座標
octomap::point3d pmax(1. - offset, 1. - offset, 1. - offset); // 調べたい領域のバウンディングボックスの最大端の座標
octomap::point3d_list node_centers; // 結果を格納するリスト
tree->getUnknownLeafCenters(node_centers, pmin, pmax, lv);

for (octomap::point3d_list::iterator it = node_centers.begin(); it != node_centers.end(); ++it) {
  std::cout << it->x() << " " << it->y() << " " << it->z() << std::endl;
  // ofDrawSphere(it->x(), it->y(), it->z(), tree->getResolution());
}
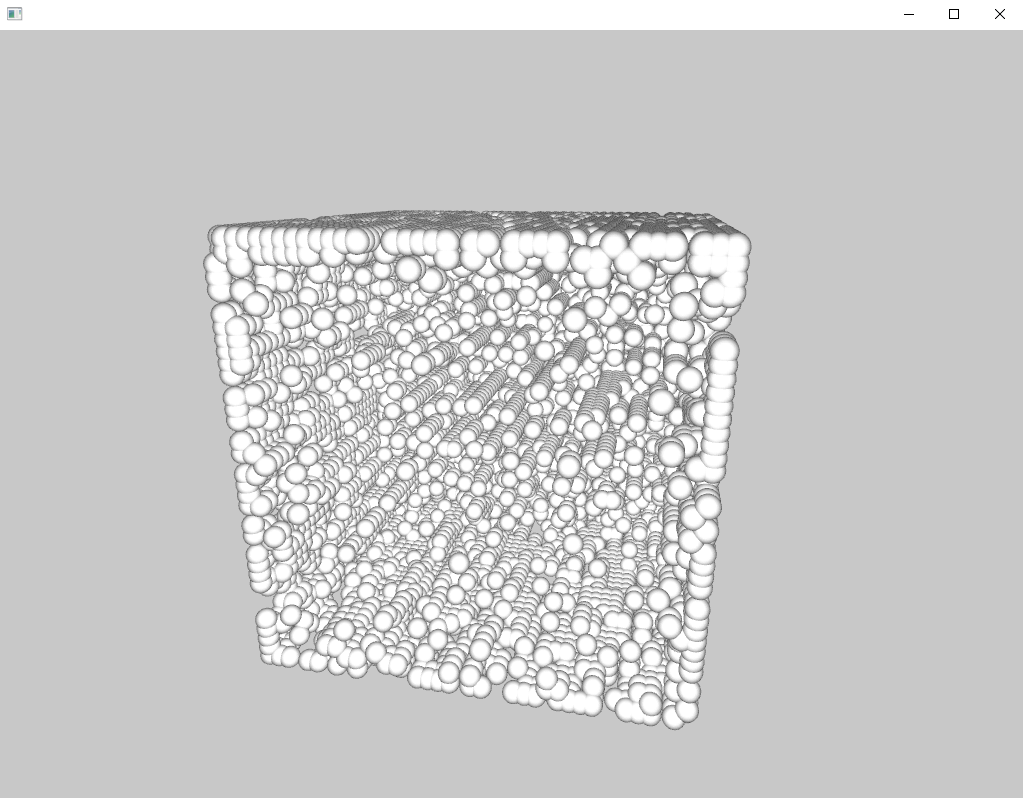
ランダムにレイを8000個ほど飛ばして、1×1×1の大きさの0.05解像度の空間を削り出してみた結果、残ったunknown領域をoFで適当に表示してみた例。
占有空間のボクセルの中心座標を取得する
思いのほか面倒くさいです。データアクセスの方法は、octomapチュートリアルのtest_iteratorsにまとめられています。
まず、再帰的にボクセルにアクセスするための補助関数を2つ用意します。
void computeChildCenter(const unsigned int& pos, const float& center_offset,
    const octomap::point3d& parent_center, octomap::point3d& child_center) {
    // x-axis
    if (pos & 1) child_center(0) = parent_center(0) + center_offset;
    else     child_center(0) = parent_center(0) - center_offset;
    // y-axis
    if (pos & 2) child_center(1) = parent_center(1) + center_offset;
    else   child_center(1) = parent_center(1) - center_offset;
    // z-axis
    if (pos & 4) child_center(2) = parent_center(2) + center_offset;
    else   child_center(2) = parent_center(2) - center_offset;
}

/// mimics old deprecated behavior to compare against
void getLeafNodesRecurs(std::list<octomap::OcTreeVolume>& voxels, unsigned int max_depth,
    octomap::OcTreeNode* node, unsigned int depth, const octomap::point3d& parent_center,
    const octomap::point3d& tree_center, octomap::OcTree* tree, bool occupied)
{
    if ((depth <= max_depth) && (node != NULL)) {
        if (tree->nodeHasChildren(node) && (depth != max_depth)) {
            float center_offset = float(tree_center(0) / pow(2., (double)depth + 1));
                octomap::point3d search_center;
                for (unsigned int i = 0; i < 8; i++) {
                    if (tree->nodeChildExists(node, i)) {
                        computeChildCenter(i, center_offset, parent_center, search_center);
                        getLeafNodesRecurs(voxels, max_depth, tree->getNodeChild(node, i), depth + 1,
                                 search_center, tree_center, tree, occupied);
                    }
              }
         }
        else {
            if (tree->isNodeOccupied(node) == occupied) {
                   double voxelSize = tree->getResolution() * pow(2., double(16 - depth));
                   voxels.push_back(std::make_pair(parent_center - tree_center, voxelSize));
            }
        }
    }
}
リーフノードを再帰的に探索して、データをリストに格納します。
    std::list<octomap::OcTreeVolume> list_depr;
    std::list<octomap::OcTreeVolume> list_iterator;

    /**
     * get all occupied leafs
     */
    unsigned char maxDepth = 16;
    const unsigned int tree_max_val(32768);
    octomap::point3d tree_center;
    tree_center(0) = tree_center(1) = tree_center(2)
            = (float)(((double)tree_max_val) * tree->getResolution());

    getLeafNodesRecurs(list_depr, maxDepth, (octomap::OcTreeNode*)tree->getRoot(), 0,
             tree_center, tree_center, (octomap::OcTree*)&(*tree), true);

    for (octomap::ColorOcTree::iterator it = tree->begin(maxDepth), end = tree->end(); it != end; ++it) {
        if (tree->isNodeOccupied(*it))
        {
             list_iterator.push_back(octomap::OcTreeVolume(it.getCoordinate(), it.getSize()));
        }
    }
取得したリストを使用して、結果を描画する例はこんな感じです。
    ofSetColor(ofColor::yellow);
    for (std::list<octomap::OcTreeVolume>::iterator it = list_iterator.begin();
         it != list_iterator.end(); ++it) {
        ofDrawSphere(it->first.x(), it->first.y(), it->first.z(), tree->getResolution());
    }
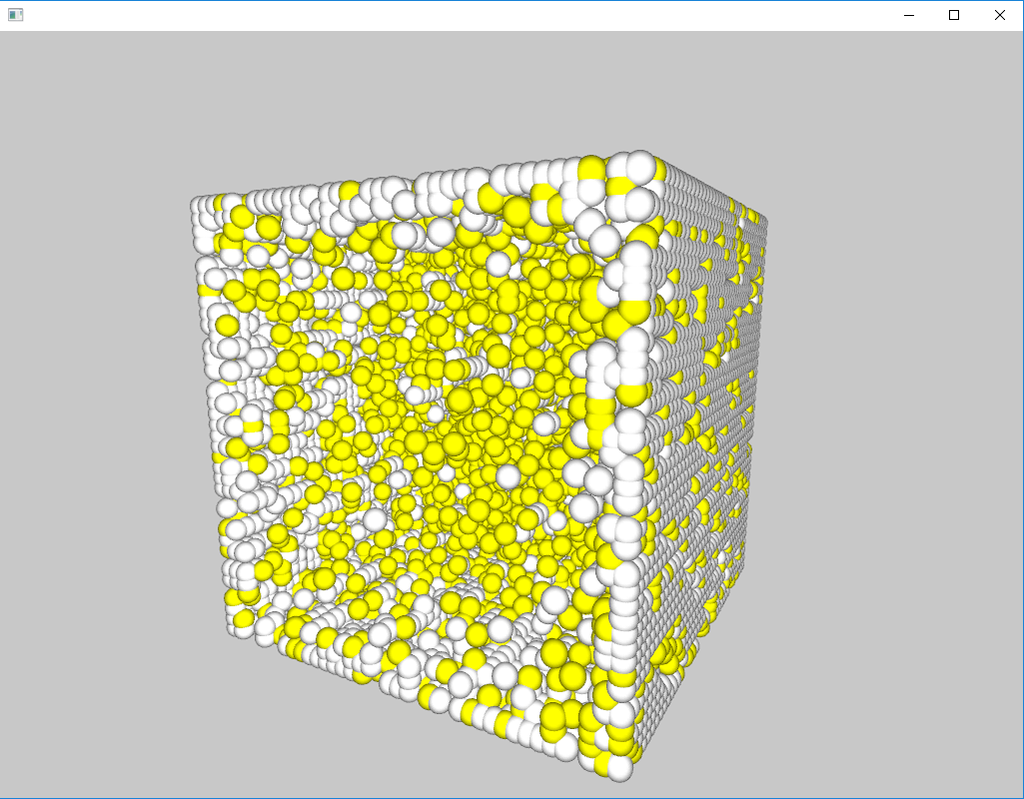
参考資料
[1] OctoMap - 3D occupancy mapping
[2] http://www2.informatik.uni-freiburg.de/~hornunga/pub/hornung13roscon.pdf
[3] ソースコードの参考に。ただし、ソース付属のチュートリアルとほぼ一緒です。
SLAM拾萃(1):octomap - 半闲居士 - 博客园
ROS関連
[4] Octomapで遊んでみた
[5] Octomapについての簡単に3次元地図を作る時のメモ - My Research Memo + Silly Story
OctoMap-3D についてのメモ - My Research Memo + Silly Story
今日の本文
沼津が誇る大漫画家西風先生の待望の新作が出ました!車が好きな人、車を勉強したい人に、とてもおすすめです。正しい偏った車知識が自然と身に付きます。

- 作者: 西風
- 出版社/メーカー: リイド社
- 発売日: 2018/09/20
- メディア: コミック
- この商品を含むブログ (1件) を見る

- 作者: 西風
- 出版社/メーカー: リイド社
- 発売日: 2018/10/20
- メディア: コミック
- この商品を含むブログを見る

- 作者: 西風
- 出版社/メーカー: リイド社
- 発売日: 2018/11/20
- メディア: コミック
- この商品を含むブログを見る
トラ技2018年10月号で紹介されている無限スプライン関数の計算アルゴリズムを試してみる
データストリームに対してリアルタイムで逐次に3次スプライン補間を計算できるアルゴリズムだそうです。

- 出版社/メーカー: CQ出版
- 発売日: 2018/09/10
- メディア: 雑誌
- この商品を含むブログを見る
#include <iostream>
#include <math.h>
#include <vector>
#include <iterator>
#include <algorithm>

#include <omp.h>

double calc_coefficient_b(double *d, int n)
{
  static const double alpha = -2. + sqrt(3.);
  static const double a = -3. * (sqrt(3.) - 1.);
  static const double b = 3. * (2. * sqrt(3.) - 3.);
  double e(0.), f(0.);
  for(int i=n; i>0; i--){
    f = d[n+i] + alpha * f;
    e = d[n-i] + alpha * e;
  }
  return a * d[n] + b * (f + e);
}

int main() {
  static const int n = 9;
  static const int multiples = 64;
  std::vector<double> output;
  output.clear();

  // input-data preparation
  double samples[] = {0., 2., 3., 5., 0., -1., 2., -3., -4., -3., 0., 3., 3., 6., 0., 9., 1.};
  std::vector<double> data(samples, std::end(samples));
  int n_samples = data.size();
  data.insert(data.begin(), n, 0.);
  data.insert(data.end(), n, 0.);

  // calc-preparation
  std::vector<double> x3, x2, x1;
  x3.clear();
  x2.clear();
  x1.clear();
  for(int i = 0; i < multiples; i++){
    double x = static_cast<double>(i) / static_cast<double>(multiples);
    x1.push_back(x);
    x2.push_back(pow(x, 2));
    x3.push_back(pow(x, 3));
  }
  std::vector<double> interpolated;
  interpolated.resize(multiples);

  int start_idx = 0;
  double bj, bj_1, dj, dj_1;
  bj = calc_coefficient_b(&data[start_idx], n);
  dj = data[start_idx];
  for(int j = start_idx; j < n_samples; j++){
    // calc coefficients
    bj_1 = calc_coefficient_b(&data[j + 1], n);
    dj_1 = data[j + n + 1];
    double aj = (bj_1 - bj) / 3.;
    double cj = dj_1 - dj - 2. * bj / 3. - bj_1 / 3.;

    // calc oversampling
#pragma omp parallel for
    for(int i = 0; i < multiples; i++){
      interpolated[i] = aj * x3[i] + bj * x2[i] + cj * x1[i] + dj;
    }
    std::copy(interpolated.begin(), interpolated.end(), std::back_inserter(output));

    bj = bj_1;
    dj = dj_1;
  }

  // outputs
  std::cout << "samples:" << std::endl;
  for(int i = start_idx; i < n_samples; i++){
    std::cout << samples[i] << std::endl;
    for(int j = 0; j < multiples - 1; j++){
      std::cout << 0. << std::endl;
    }
  }
  std::cout << "output:" << std::endl;
  for(int i=0; i<output.size(); i++){
    std::cout << output[i] << std::endl;
  }

  return 0;
}
適当な入力データに対する計算結果はこんな感じ。
b:
2.1531
- 2.03546
2.98887
- 6.91988
3.69088
4.1564
- 8.31614
5.10831
- 0.117074
1.35999
0.677115
- 4.06843
6.59671
- 13.3183
19.6765
- 20.3877
10.8744
- 2.10998

きれいにスプライン補間できていそうですね。
あまりにもアルゴリズムが簡単すぎて、これが本当に新しくて凄いものなのかピンと来ていません。
[1] https://www.tezukuri-amp.org/bunkakai/dac/cgi-bin/img-box/img20170804205124.pdf
GitHub - kritzikratzi/ofxAvCodec: openFrameworks wrapper for FFmpeg/libavcodec
GitHub - roymacdonald/ofxSoundObjects: openFrameworks addon implementation for the ofSoundObject implementaion developed at the YCAM '13 ofDevCon, yet never released
自分用読むべき論文メモ 2018年09月版
github.com
[1711.07566] Neural 3D Mesh Renderer
カテゴリが既知の物体について、単眼画像からの3次元形状推定を行う話。メッシュが少しなめらか。
sites.google.com
カテゴリが既知の物体について、単眼画像からの3次元形状推定を行う話。ボクセルで復元。
https://vision.in.tum.de/research/vslam/stereo-dso
とても精度が良いステレオ画像入力のSLAMライブラリ
ai.googleblog.com
GraspGAN
SSDAC特設サイト
プリエコーの出ないディジタルフィルタレスDAC。トラ技2018年10月号。
www.tensorflow.org
Tensorflow Hub. 学習済みモデルを簡単に配布、利用するための仕組み。
www.jstage.jst.go.jp
カルマンフィルタ資料
強化学習の安全性を保障するため、安全シグナルc(温度や壁までの近さなど)を定義し、これが常に閾値以下になるようにする。cを線形化したモデルを過去の動作ログから推定することで探索中も保障し、また連続な行動空間の場合も安全な行動を微分可能な閉じた式で推定可能。https://t.co/BGeMG0S4hW
— Daisuke Okanohara (@hillbig) 2018年9月19日
[1801.08757] Safe Exploration in Continuous Action Spaces
イメージヤコビアンを用いないビジャルサーボによる位置決め
○徳田冬樹(東北大学) 荒井翔悟(東北大学) 小菅一弘(東北大学)Previewed Reality 情報構造化空間における近未来可視化システム ー透過型ディスプレイHoloLensを用いたシステム構築と実験ー
○江頭 飛鳥 堀川 雄太 河村 晃宏 倉爪 亮(九州大学)
RSJ2018
http://vigir.missouri.edu/~gdesouza/Research/Conference_CDs/IEEE_IROS_2013/media/files/0778.pdf
NDT-D2D
自分用読むべき論文メモ 2018年08月版
[1808.00769] Sparse and Dense Data with CNNs: Depth Completion and Semantic Segmentation
疎なデプスデータをそのままネットワークに突っ込んでも綺麗なデータは得られる
NASA/JPLがキュリオシティやオポチュニティのようなローバーを作るためのDIYマニュアルを公開しました!
— 大丸拓郎 (NASA/JPL) (@takurodaimaru) 2018年8月6日
制作費用25万円ほどで6輪のロッカーボギーサスペンションのローバーが作れちゃいます。
大学のサークルとか教育目的で作るのにちょうど良さそうです。https://t.co/8V7KjD1kTm pic.twitter.com/89GXOhCzQq
https://scienceandtechnology.jpl.nasa.gov/build-your-own-rover
GitHub - nasa-jpl/open-source-rover: A build-it-yourself, 6-wheel rover based on the rovers on Mars!
NASA/JPLローバーのDIYマニュアル。いろいろ参考にできそう。
GOSELO
DNNを使ったナビゲーション
"Depth Cameras: A State-of-the-Art Overview," a Presentation from Aquifi from Embedded Vision Alliancewww.slideshare.net
www.youtube.com
各種Depthカメラの仕組み
cpp-learning.com
興味深いが読みづらい。
MIRU 2018 - チュートリアル
www.slideshare.net
MIRU2018チュートリアル
MIRU MIRU わかる GAN
[1804.09627] Actor and Observer: Joint Modeling of First and Third-Person Videos
qiita.com
タイトルが気になる、
www.slideshare.net
時間でなく空間で考える
gengo.ai
機械学習に使えそうなデータセットまとめ。同じ趣旨の情報が乱立しているので、そろそろ、まとめのまとめが必要ですね。
https://people.eecs.berkeley.edu/~sgupta/pdf/rcnn-depth.pdf
GitHub - s-gupta/rcnn-depth: Learning Rich Features from RGB-D Images for Object Detection and Segmentation
https://kanezaki.github.io/media/RobotSeminar20180531_AsakoKanezaki.pdf
楢ノ木技研 - 低価格・高機能マルチチャンネル分光器 ezSpectra
安価なマルチスペクトルメータ。
miso-engine.hatenablog.com
ofxOscはUDPなんだよなー
github.com
Google謹製TensorFlowベースの強化学習フレームワーク
今日の山靴
日本人の足の形によく合う日本メーカーのトレッキングシューズ。

SIRIO(シリオ) ライトトレッキング PF430 22.5cm ウィメンズ/KH
- メディア: ウェア&シューズ
- この商品を含むブログを見る
安価なIMU(AHRS)センサのBosch BNO055USBStickを試す(その3)
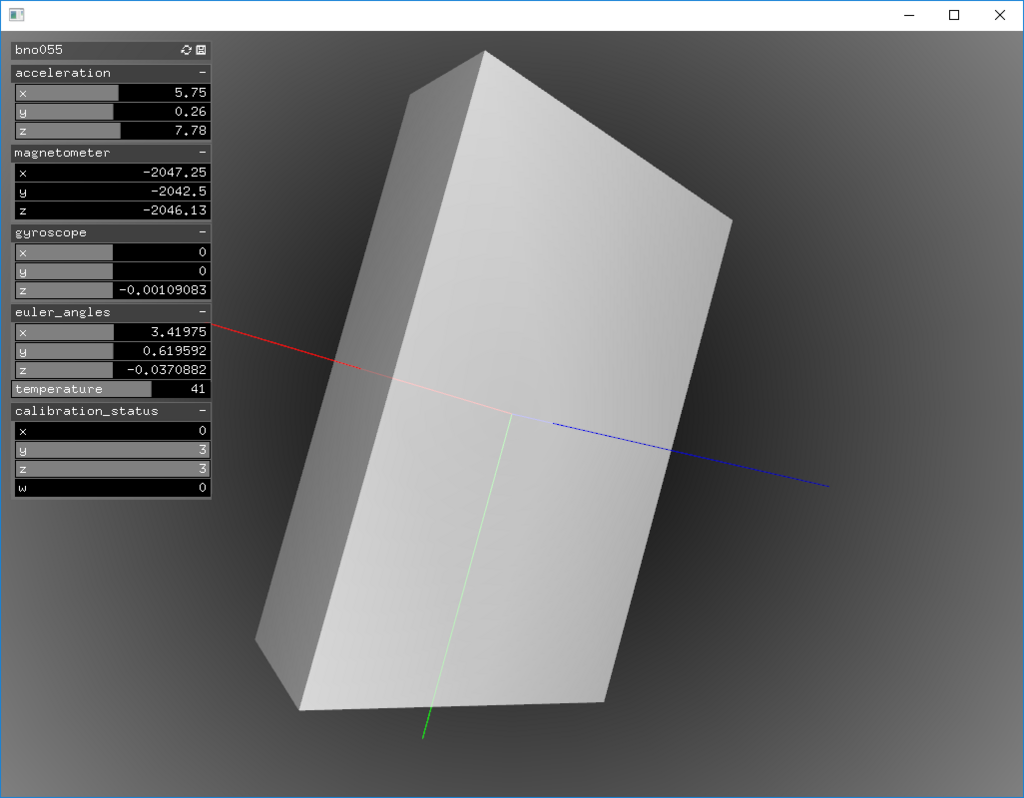
前回、BNO055USBStickのデータを自前のプログラムで取得することはできるようになりました。でも、数値だけを見ていても正しいかどうか判断できませんので、いつものようにopenFrameworksで可視化していきたいと思います。
ofxBNO055USBStick
外部addonとしてofxGui.hを使っていますので、ProjectGeneratorで追加してください。
ofApp.h
#pragma once

#include "bno055_usb_stick/bno055_usb_stick.hpp"
#include "bno055_usb_stick/decoder.hpp"
#include "bno055_usb_stick_msgs/Output.h"

#include <boost/asio/io_service.hpp>
#include <boost/bind.hpp>
#include <boost/shared_ptr.hpp>

#include "ofMain.h"
#include "ofThread.h"
#include "ofEasyCam.h"
#include "ofxGui.h"

class ofxBNO055USBStick : public ofThread
{
public:
	void setup() {
		const std::string fixed_frame_id("fixed");
		device = std::make_shared<bno055_usb_stick::BNO055USBStick>(asio_service, boost::bind(&ofxBNO055USBStick::publish, this, _1, fixed_frame_id));
	}

	void threadedFunction() {
		while (1) {
			asio_service.run_one();
		}
	}

	void publish(const bno055_usb_stick_msgs::Output &output, const std::string &fixed_frame_id) {
		mutex.lock();
		current = output;
		mutex.unlock();
	}

	bno055_usb_stick_msgs::Output & getOutput() { return current;  }

protected:
	boost::asio::io_service asio_service;
	std::shared_ptr<bno055_usb_stick::BNO055USBStick> device;

	ofMutex mutex;
	bno055_usb_stick_msgs::Output current;
};

class ofApp : public ofBaseApp{

	public:
		void setup();
		void update();
		void draw();

		void keyPressed(int key);
		void keyReleased(int key);
		void mouseMoved(int x, int y );
		void mouseDragged(int x, int y, int button);
		void mousePressed(int x, int y, int button);
		void mouseReleased(int x, int y, int button);
		void mouseEntered(int x, int y);
		void mouseExited(int x, int y);
		void windowResized(int w, int h);
		void dragEvent(ofDragInfo dragInfo);
		void gotMessage(ofMessage msg);

		ofxBNO055USBStick bno055;
		bno055_usb_stick_msgs::Output output;

		ofEasyCam cam;
		ofLight light;
		ofBoxPrimitive box;
		ofCylinderPrimitive cylinder;

		ofxPanel gui;
		ofParameter<ofVec3f> acceleration;
		ofParameter<ofVec3f> magnetometer;
		ofParameter<ofVec3f> gyroscope;
		ofParameter<ofVec3f> euler_angles;
		ofParameter<ofQuaternion> quaternion;
		ofParameter<ofVec3f> linear_acceleration;
		ofParameter<ofVec3f> gravity_vector;
		ofParameter<double> temperature;
		ofParameter<ofVec4f> calibration_status;
};
ofApp.cpp
#include "ofApp.h"

//--------------------------------------------------------------
void ofApp::setup(){
	// sensor settings
	bno055.setup();
	bno055.startThread();

	// draw settings
	box.set(0.5f, 0.8f, 0.2f);
	cam.setTarget(box);
	cam.setNearClip(0.001f);
	cam.setFarClip(1000.f);
	cam.setDistance(1.f);
	light.setParent(cam);
	cylinder.set(0.1f, 0.7f);

	// gui settings
	gui.setup("bno055");
	gui.add(acceleration.set("acceleration", ofVec3f(), ofVec3f(-100.f), ofVec3f(100.f)));
	gui.add(magnetometer.set("magnetometer", ofVec3f(), ofVec3f(-1000.f), ofVec3f(1000.f)));
	gui.add(gyroscope.set("gyroscope", ofVec3f(), ofVec3f(-100.f), ofVec3f(100.f)));
	gui.add(euler_angles.set("euler_angles", ofVec3f(), ofVec3f(-10.f), ofVec3f(10.f)));
	gui.add(temperature.set("temperature", 0., -100., 100.));
	gui.add(calibration_status.set("calibration_status", ofVec4f(), ofVec4f(0), ofVec4f(3)));
}

//--------------------------------------------------------------
void ofApp::update(){
	output = bno055.getOutput();

	acceleration = output.acceleration;
	magnetometer = output.magnetometer;
	gyroscope = output.gyroscope;
	euler_angles = output.euler_angles;
	quaternion = output.quaternion;
	linear_acceleration = output.linear_acceleration;
	gravity_vector = output.gravity_vector;
	temperature = output.temperature;
	calibration_status = output.calibration_status;
}

//--------------------------------------------------------------
void ofApp::draw(){
	ofBackgroundGradient(ofColor::black, ofColor::grey);
	ofEnableLighting();
	ofEnableDepthTest();
	light.enable();

	cam.begin();
	ofPushMatrix();
	ofMatrix4x4 mat;
	mat.setRotate(output.quaternion);
	ofMultMatrix(mat);
	box.drawAxes(0.5f);
	ofPushStyle();
	ofSetColor(ofColor::white, 200);
	box.draw();
	ofPopStyle();
	ofPopMatrix();
	cam.end();

	ofDisableLighting();
	ofDisableDepthTest();

	gui.draw();
}

//--------------------------------------------------------------
void ofApp::keyPressed(int key){

}

//--------------------------------------------------------------
void ofApp::keyReleased(int key){

}

//--------------------------------------------------------------
void ofApp::mouseMoved(int x, int y ){

}

//--------------------------------------------------------------
void ofApp::mouseDragged(int x, int y, int button){

}

//--------------------------------------------------------------
void ofApp::mousePressed(int x, int y, int button){

}

//--------------------------------------------------------------
void ofApp::mouseReleased(int x, int y, int button){

}

//--------------------------------------------------------------
void ofApp::mouseEntered(int x, int y){

}

//--------------------------------------------------------------
void ofApp::mouseExited(int x, int y){

}

//--------------------------------------------------------------
void ofApp::windowResized(int w, int h){

}

//--------------------------------------------------------------
void ofApp::gotMessage(ofMessage msg){

}

//--------------------------------------------------------------
void ofApp::dragEvent(ofDragInfo dragInfo){

}
Addon化
openFrameworksのAddonにしました。
github.com
今日の京都まんが
2人の主人公のそれぞれの視点を描いたチヒロのこととユキチのことと、の2シリーズが刊行されているかなり実験的な漫画。アクションコミックスとヤングチャンピオンと掲載誌も違ったため、コミックスの本屋の棚も違うので探そうとすると難易度高いことがある。

- 作者: 今井大輔
- 出版社/メーカー: 双葉社
- 発売日: 2015/09/25
- メディア: Kindle版
- この商品を含むブログを見る

- 作者: 今井大輔
- 出版社/メーカー: 双葉社
- 発売日: 2016/02/25
- メディア: コミック
- この商品を含むブログ (1件) を見る

- 作者: 今井大輔
- 出版社/メーカー: 双葉社
- 発売日: 2016/05/25
- メディア: コミック
- この商品を含むブログを見る

古都こと―ユキチのこと― 1 (ヤングチャンピオン・コミックス)
- 作者: 今井大輔
- 出版社/メーカー: 秋田書店
- 発売日: 2015/09/25
- メディア: Kindle版
- この商品を含むブログを見る

古都ことーユキチのことー 2 (ヤングチャンピオンコミックス)
- 作者: 今井大輔
- 出版社/メーカー: 秋田書店
- 発売日: 2016/02/25
- メディア: コミック
- この商品を含むブログ (1件) を見る

古都ことーユキチのことー 3 (ヤングチャンピオンコミックス)
- 作者: 今井大輔
- 出版社/メーカー: 秋田書店
- 発売日: 2016/05/25
- メディア: コミック
- この商品を含むブログを見る
